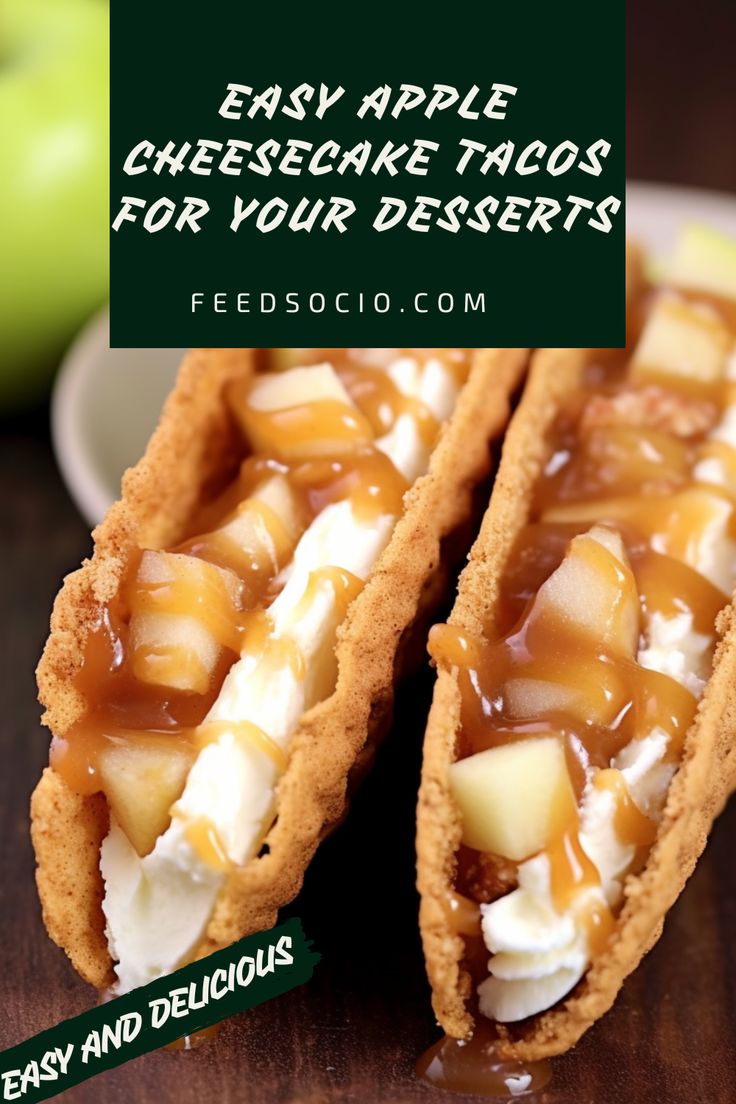
These Apple Cheesecake Tacos are a fun and delicious twist on traditional cheesecake! Featuring crispy cinnamon-sugar taco shells filled with creamy cheesecake filling and warm, spiced apple topping, this dessert is a showstopper for fall gatherings, holiday parties, or anytime you want a sweet treat. The contrast of the crunchy shell, smooth cheesecake, and caramelized apples makes every bite an explosion of flavor!
Perfect for individual servings, these dessert tacos are easy to make and require simple ingredients. Whether you’re hosting a party or just treating yourself, this recipe will quickly become a favorite. Serve them warm with a drizzle of caramel sauce and enjoy a handheld treat that combines all the best flavors of apple pie and cheesecake!
- Prep Time: 20 minutes
- Cook Time: 15 minutes
- Chill Time: 1 hour
- Total Time: 1 hour 35 minutes
- Serving Size: 1 taco
- Servings: 8 tacos
Ingredients
For the Taco Shells:
- 8 small flour tortillas
- ½ cup granulated sugar
- 1 teaspoon cinnamon
- ¼ cup unsalted butter, melted
For the Apple Filling:
- 2 large apples, peeled, cored, and diced
- 2 tablespoons butter
- ¼ cup brown sugar
- ½ teaspoon cinnamon
- ⅛ teaspoon nutmeg
- 1 teaspoon lemon juice
- 1 teaspoon cornstarch mixed with 1 tablespoon water
For the Cheesecake Filling:
- 8 oz cream cheese, softened
- ½ cup powdered sugar
- 1 teaspoon vanilla extract
- ½ cup heavy whipping cream
For Garnishing:
- Caramel sauce (optional)
- Chopped pecans (optional)
- Extra cinnamon sugar (for sprinkling)
Instructions
Making the Taco Shells:
- Preheat the oven: Set your oven to 375°F (190°C). Line a baking sheet with parchment paper.
- Prepare the cinnamon sugar: In a small bowl, mix the sugar and cinnamon.
- Coat the tortillas: Brush both sides of each tortilla with melted butter, then sprinkle with cinnamon sugar.
- Shape the tacos: Drape the tortillas over two oven racks to form a taco shape.
- Bake: Bake for 10-12 minutes until golden brown and crispy. Let cool completely.
Making the Apple Filling:
- Cook the apples: In a skillet over medium heat, melt the butter. Add diced apples, brown sugar, cinnamon, nutmeg, and lemon juice.
- Simmer: Cook for 5-7 minutes until the apples soften.
- Thicken the filling: Stir in the cornstarch slurry and cook for 1-2 more minutes until thickened. Remove from heat and let cool.
Making the Cheesecake Filling:
- Beat the cream cheese: In a large bowl, beat the cream cheese, powdered sugar, and vanilla extract until smooth.
- Whip the cream: In a separate bowl, beat the heavy whipping cream until stiff peaks form.
- Combine: Gently fold the whipped cream into the cream cheese mixture.
- Chill: Refrigerate the cheesecake filling for at least 1 hour before assembling.
Assembling the Apple Cheesecake Tacos:
- Fill the taco shells: Pipe or spoon the cheesecake filling into each cooled taco shell.
- Add apple topping: Spoon the apple mixture over the cheesecake layer.
- Drizzle with caramel: If desired, drizzle caramel sauce over the top and sprinkle with chopped pecans.
Serving:
- Serve immediately for a crispier texture or refrigerate for up to 24 hours before serving.
- Enjoy as a handheld dessert or with a scoop of vanilla ice cream.
Tips for the Best Apple Cheesecake Tacos
- Use Crisp Apples: Granny Smith or Honeycrisp apples hold their shape best for the filling.
- Make Ahead: Prepare the filling and shells separately and assemble just before serving.
- Keep the Shells Crisp: Store taco shells at room temperature and fill them right before eating to prevent sogginess.
- For a Shortcut: Use canned apple pie filling instead of making your own.
Creative Variations
- Chocolate Drizzle: Add melted chocolate over the top for extra indulgence.
- Pumpkin Spice Version: Swap apples for pumpkin pie filling and add pumpkin spice to the cheesecake mixture.
- Berry Cheesecake Tacos: Replace apples with mixed berries for a fresh and tangy alternative.
- Nut-Free Option: Skip the pecans and use toasted coconut for extra texture.
FAQs
Can I make these ahead of time? Yes! Store the components separately and assemble them before serving for the best texture.
How do I store leftovers? Keep assembled tacos in an airtight container in the fridge for up to 24 hours. The shells may soften over time.
Can I use premade taco shells? Yes! Store-bought dessert taco shells or waffle cones can work as a substitute.
What’s the best way to serve these? Drizzle with caramel or chocolate sauce and serve with a dollop of whipped cream or ice cream.
These Apple Cheesecake Tacos are crispy, creamy, and filled with the warm flavors of cinnamon and apples. They’re a fun, handheld dessert perfect for any occasion. Try them today and enjoy a delicious twist on classic cheesecake!
